7 Critical Bedroom Feature Wall Mistakes (And How to Avoid Them)
"The difference between a feature wall that transforms your bedroom and one that overwhelms it often comes down to avoiding a few critical mistakes. Learn from others' experiences to ensure your project succeeds from the start."
Feature walls can dramatically enhance your bedroom's design, but they can also become expensive disasters when common mistakes aren't avoided. After analyzing hundreds of bedroom feature wall projects—both successful transformations and costly failures—we've identified the most critical errors that can derail your design dreams.
Whether you're planning your first bedroom feature wall project or selecting the perfect materials, this guide will help you navigate potential pitfalls and create a stunning focal point that enhances your space for years to come.
Mistake #1: Choosing the Wrong Wall
The Problem: Many homeowners automatically choose the wall behind their bed without considering whether it's actually the best option for their specific room layout.
Why This Happens
- Following generic design advice without considering room specifics
- Not evaluating how furniture placement affects wall visibility
- Ignoring architectural features that might make other walls better choices
- Assuming the headboard wall is always the correct choice
Common Wrong Wall Scenarios
The Hidden Wall
What happens: The feature wall is barely visible due to furniture placement or room layout. Example: A large armoire or dresser blocks most of the wall view from the room's main vantage points.
The Overwhelming Wall
What happens: The chosen wall dominates a small room, making the space feel cramped. Example: A bold, dark feature wall in a small bedroom that already lacks natural light.
The Unbalanced Wall
What happens: The feature wall creates awkward proportions or competing focal points. Example: A feature wall opposite a large window, creating visual competition.
How to Choose the Right Wall
Evaluate from Multiple Angles
- Entrance view: What do you see when you first enter the room?
- Bed view: What's visible when you're lying in bed?
- Seating areas: Consider views from chairs or reading nooks
- Daily traffic patterns: Think about how you move through the space
Consider Room Proportions
- Small rooms: Choose walls that won't overwhelm the space
- Long, narrow rooms: Use feature walls to improve proportions
- Square rooms: Most walls work well, giving you more flexibility
- Awkward layouts: Feature walls can help balance unusual shapes
Work with Architecture
- Natural focal points: Enhance existing architectural features
- Problem areas: Use feature walls to draw attention away from flaws
- Lighting conditions: Consider how natural and artificial light affects each wall
- Ceiling height: Some walls work better with low or high ceilings
Pro Tip: Live in your space for at least a week before deciding on the feature wall. Notice which wall naturally draws your eye and where you spend the most time looking.
Mistake #2: Ignoring Scale and Proportion
The Problem: Choosing patterns, textures, or elements that are completely wrong for your room size creates visual chaos instead of harmony.
Scale Disasters We See Repeatedly
Tiny Patterns in Large Rooms
What happens: Small, busy patterns get lost in spacious bedrooms, creating a cluttered, insignificant appearance. Example: Delicate floral wallpaper in a master bedroom with 12-foot ceilings.
Overwhelming Patterns in Small Spaces
What happens: Large-scale patterns dominate small bedrooms, making them feel even more cramped. Example: Bold, oversized geometric wallpaper in a 10x10 bedroom.
Horizontal Elements in Low-Ceiling Rooms
What happens: Horizontal wood planks or stripes make already low ceilings feel even lower. Example: Shiplap running horizontally in a basement bedroom with 7-foot ceilings.
Getting Scale Right
For Small Bedrooms (Under 120 sq ft)
- Patterns: Small to medium scale, simple designs
- Textures: Subtle, not heavily dimensional
- Colors: Light to medium tones, avoid overwhelming darks
- Elements: Vertical lines to enhance height perception
For Medium Bedrooms (120-200 sq ft)
- Patterns: Medium scale works well, some larger elements acceptable
- Textures: Moderate texture adds interest without overwhelming
- Colors: More flexibility with both light and dark options
- Elements: Both horizontal and vertical elements can work
For Large Bedrooms (200+ sq ft)
- Patterns: Large-scale patterns create appropriate impact
- Textures: Bold textures and dimensional elements work well
- Colors: Full range of colors, including deep, dramatic options
- Elements: Statement pieces and complex designs can succeed
The Golden Rule of Scale
Stand back and evaluate your feature wall from the furthest point in your bedroom. If the pattern or texture disappears or becomes muddy, it's too small. If it overwhelms your vision, it's too large.
When planning your wall design, consider how different material options work with various room sizes to ensure perfect proportional balance.
Mistake #3: Poor Color Choices for Sleep Spaces
The Problem: Selecting colors that energize rather than relax, or failing to consider how colors affect sleep quality and room atmosphere.
Color Psychology Oversights
Energizing Colors in Rest Spaces
What happens: Bright reds, electric blues, or vibrant oranges can interfere with sleep and relaxation. The science: These colors can increase heart rate and alertness when you need to wind down.
Ignoring Natural Light Conditions
What happens: Colors that look beautiful in the store appear completely different in your bedroom's specific lighting. Example: A "warm gray" that turns purple or green in your room's natural light.
Seasonal Color Regret
What happens: Choosing colors based on current trends or seasons without considering long-term livability. Example: Deep, moody colors chosen in winter that feel oppressive during bright summer months.
Bedroom-Appropriate Color Strategies
Colors That Promote Rest
- Blues: Lower heart rate and blood pressure, promote calm
- Soft greens: Connect with nature, reduce eye strain
- Warm grays: Sophisticated neutrals that work with any decor
- Muted purples: Calming without being cold
- Soft, dusty pinks: Warm and nurturing without being overwhelming
Colors to Use Sparingly
- Bright reds: Can increase energy and disrupt sleep
- Vibrant oranges: Too energizing for rest spaces
- Electric blues: More suitable for active spaces
- Pure black: Can feel oppressive in large quantities
- Bright yellows: May be too stimulating for bedrooms
Testing Colors Properly
The 24-Hour Test
- Paint large samples (at least 2x2 feet) on your chosen wall
- Observe at different times: Morning light, afternoon sun, evening artificial light
- Live with it for days before making final decisions
- Consider mood changes throughout the day
Lighting Considerations
- North-facing rooms: Need warmer colors to counteract cool light
- South-facing rooms: Can handle cooler colors without feeling cold
- Artificial lighting: LED bulbs can change color appearance significantly
- Evening ambiance: Consider how colors look in dim, relaxing lighting
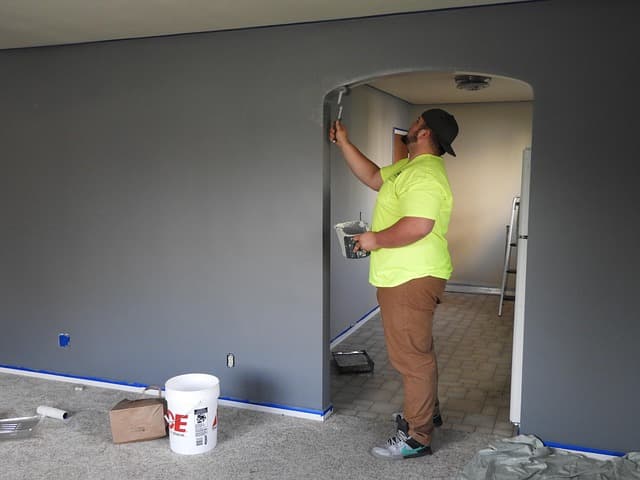
Mistake #4: Installation and Technical Failures
The Problem: Poor preparation, inadequate tools, or skipping crucial steps leads to professional-looking materials appearing amateurish.
Common Installation Disasters
Inadequate Wall Preparation
What happens: Paint peels, wallpaper bubbles, or wood panels warp because the wall wasn't properly prepared.
Proper preparation checklist:
- Clean thoroughly: Remove all dirt, grease, and residue
- Repair imperfections: Fill holes, sand rough spots, address cracks
- Prime appropriately: Use the right primer for your wall material and chosen covering
- Test adhesion: Ensure new materials will bond properly
Pattern Misalignment
What happens: Wallpaper patterns don't match, wood planks aren't level, or geometric paint designs look crooked.
Prevention strategies:
- Measure twice, cut once: Careful planning prevents costly mistakes
- Use proper tools: Levels, laser lines, and measuring devices ensure accuracy
- Plan pattern placement: Start from the center and work outward
- Account for room irregularities: Most rooms aren't perfectly square
Poor Material Acclimation
What happens: Wood panels warp, wallpaper shrinks, or materials don't adhere properly because they weren't acclimated to room conditions.
Acclimation process:
- Wood materials: Store in the room for 48-72 hours before installation
- Wallpaper: Allow rolls to reach room temperature
- Adhesives: Ensure optimal temperature and humidity for application
- Climate control: Maintain consistent conditions during installation
When to Call Professionals
Complex Patterns
- Intricate wallpaper designs that require precise pattern matching
- Geometric paint designs with multiple colors and crisp lines
- Mixed material installations combining different elements
Structural Considerations
- Heavy materials like stone or thick wood panels
- Electrical integration for lighting or outlets
- Moisture concerns in bedrooms with attached bathrooms
High-End Materials
- Expensive wallpapers where mistakes are costly
- Natural stone or brick requiring specialized knowledge
- Custom millwork needing precise carpentry skills
Mistake #5: Overwhelming the Space
The Problem: Creating a feature wall so bold or busy that it dominates the room instead of enhancing it, leading to visual fatigue and design imbalance.
Signs of an Overwhelming Feature Wall
Visual Competition
What happens: The feature wall competes with other room elements instead of complementing them. Examples:
- Bold patterned wallpaper combined with busy bedding
- Dark, dramatic wall colors in rooms with insufficient lighting
- Multiple competing focal points creating visual chaos
Emotional Overwhelm
What happens: The wall creates stress or anxiety instead of promoting rest and relaxation. Symptoms:
- Feeling restless or unsettled in the bedroom
- Difficulty falling asleep due to visual stimulation
- Guests commenting that the room feels "busy" or "intense"
Creating Balance Instead of Overwhelm
The 60-30-10 Rule for Feature Walls
- 60%: Neutral, calming elements (other walls, large furniture pieces)
- 30%: Your feature wall and coordinating elements
- 10%: Accent pieces that tie everything together
Complementary Design Strategy
- Simple bedding: Let bold walls shine with understated linens
- Minimal accessories: Reduce wall art and decorative items on other walls
- Coordinated colors: Pull accent colors from the feature wall for pillows and accessories
- Balanced lighting: Ensure adequate illumination to prevent the wall from feeling oppressive
The Rest and Restore Test
Ask yourself: "Does this feature wall make me want to relax and unwind?" If the answer is no, it's likely too overwhelming for a bedroom space.
Mistake #6: Ignoring Lighting Integration
The Problem: Failing to consider how lighting affects your feature wall's appearance throughout the day, or missing opportunities to enhance the wall with integrated lighting.
Lighting Oversights That Ruin Feature Walls
Natural Light Conflicts
What happens: The feature wall looks completely different in natural light versus artificial light, creating disappointment with the final result.
Common scenarios:
- Morning light: Cool northern light makes warm colors appear muddy
- Afternoon sun: Intense direct light washes out subtle textures
- Evening artificial light: LED bulbs change color perception dramatically
Missed Enhancement Opportunities
What happens: Feature walls fall flat because they lack proper lighting to showcase texture and create ambiance.
Enhancement opportunities:
- Grazing light: Wall washers or picture lights that highlight texture
- Backlighting: LED strips behind panels for dramatic effect
- Accent lighting: Spotlights that create shadow play with dimensional elements
- Integrated fixtures: Sconces or reading lights built into the feature wall design
Lighting Integration Strategies
Planning Phase Considerations
- Electrical planning: Run wiring before wall installation when possible
- Switch placement: Plan convenient controls for feature wall lighting
- Dimming capabilities: Include dimmers for mood control
- Smart integration: Consider app-controlled lighting for maximum flexibility
Material-Specific Lighting Approaches
Textured Materials (Wood, Stone, 3D Panels)
- Grazing light: Emphasizes texture and creates dramatic shadows
- Multiple angles: Lighting from different directions reveals all textural elements
- Warm color temperature: 2700K-3000K enhances natural materials
Smooth Materials (Paint, Wallpaper)
- Even illumination: Prevents hotspots and glare
- Color accuracy: Full-spectrum lighting shows true colors
- Accent integration: Picture lights or art lighting for wall hangings
Reflective Materials (Metallic, Glossy)
- Controlled angles: Prevent unwanted glare and reflections
- Indirect lighting: Bounced light creates even illumination
- Dynamic effects: Color-changing LEDs can create mood variations
Mistake #7: Poor Long-Term Planning
The Problem: Focusing only on immediate visual impact without considering how the feature wall will age, how lifestyle changes might affect it, or how it fits with long-term design evolution.
Short-Sighted Decisions
Trend-Driven Choices
What happens: Selecting materials or patterns based on current trends without considering personal long-term preferences.
Examples of trend mistakes:
- Instagram-worthy shiplap that feels dated after widespread adoption
- Maximalist wallpapers chosen during bold design trend phases
- Color-of-the-year selections that quickly feel outdated
Lifestyle Change Oversights
What happens: Feature wall choices that work now become problematic as life circumstances change.
Common lifestyle changes to consider:
- Growing families: Will bold patterns work with children?
- Aging in place: Will maintenance requirements become burdensome?
- Career changes: Might work-from-home needs affect bedroom function?
- Health considerations: Could allergies or mobility issues affect material choices?
Future-Proofing Your Feature Wall
Timeless Design Principles
- Classic proportions: Well-scaled designs remain attractive across trends
- Quality materials: Invest in materials that age gracefully
- Neutral foundations: Build bold elements around neutral bases
- Flexible accents: Use easily changeable elements for trend participation
Adaptability Planning
- Modular systems: Choose elements that can be updated or reconfigured
- Paint-friendly bases: Ensure walls can be easily repainted if needed
- Removable options: Consider peel-and-stick solutions for rental properties
- Professional resale appeal: Balance personal taste with broad market appeal
Maintenance Reality Check
- Cleaning requirements: Be honest about your cleaning commitment
- Repair complexity: Consider how difficult damage repair might be
- Professional services: Factor in long-term professional maintenance costs
- Material lifespan: Understand replacement timelines for different materials
The 10-Year Test
Before finalizing your feature wall decision, ask: "Will I still love this choice in 10 years?" If you have any doubts, consider more timeless alternatives or ways to make the design more adaptable.
For comprehensive guidance on creating feature walls that stand the test of time, review our complete feature wall planning guide and material selection strategies.
Recovery Strategies: Fixing Feature Wall Mistakes
Even the best-planned projects sometimes go wrong. Here's how to recover from common feature wall disasters without starting over completely.
Color Correction Solutions
Too Bold or Dark
- Partial coverage: Paint or wallpaper just the upper or lower portion
- Accent integration: Add complementary colors to balance intensity
- Lighting adjustment: Improve lighting to make colors more livable
- Furniture solutions: Use light-colored furniture to balance darkness
Wrong Undertones
- Color washing: Apply translucent glazes to shift undertones
- Accent color introduction: Use accessories to correct color temperature
- Lighting temperature: Adjust bulb color temperature to improve appearance
Scale and Proportion Fixes
Pattern Too Large
- Border integration: Add borders or trim to break up large patterns
- Furniture placement: Use larger furniture pieces to improve scale relationship
- Partial coverage: Cover only a portion of the wall with the pattern
Pattern Too Small
- Accent enhancement: Add larger-scale accessories to complement
- Lighting effects: Use dramatic lighting to add visual weight
- Material layering: Add dimensional elements over existing patterns
Installation Problem Solutions
Minor Alignment Issues
- Strategic furniture placement: Hide problem areas behind furniture
- Decorative trim: Add molding or trim to disguise imperfections
- Artwork placement: Use wall art to draw attention away from flaws
Major Installation Failures
- Professional consultation: Sometimes expert help is the most cost-effective solution
- Partial replacement: Replace only the most problematic sections
- Design pivot: Incorporate mistakes into a new, intentional design direction
Prevention Checklist: Avoiding Future Mistakes
Use this comprehensive checklist before starting your next bedroom feature wall project:
Planning Phase
- [ ] Lived in the space for at least one week to understand traffic patterns
- [ ] Evaluated all possible wall options, not just the obvious choice
- [ ] Considered room size and proportions in material/pattern selection
- [ ] Tested colors in room's specific lighting conditions for 24+ hours
- [ ] Planned for electrical/lighting integration before installation
- [ ] Considered long-term lifestyle changes and design evolution
- [ ] Set realistic budget including professional help if needed
Material Selection
- [ ] Chosen materials appropriate for bedroom use and maintenance level
- [ ] Verified materials work with room's humidity and temperature conditions
- [ ] Considered how materials age and change over time
- [ ] Planned for material acclimation and proper storage
- [ ] Researched installation requirements and difficulty level
Installation Preparation
- [ ] Properly prepared walls (cleaning, priming, repairs)
- [ ] Gathered all necessary tools and materials before starting
- [ ] Planned installation sequence and timeline
- [ ] Arranged for professional help where needed
- [ ] Prepared for proper material acclimation
Design Integration
- [ ] Planned how feature wall integrates with existing decor
- [ ] Considered balance with other room elements
- [ ] Planned lighting to enhance feature wall appearance
- [ ] Thought through furniture placement and room flow
- [ ] Considered how feature wall affects room's emotional atmosphere
Conclusion: Creating Feature Walls That Enhance, Don't Overwhelm
The difference between a feature wall that transforms your bedroom and one that you regret lies in careful planning, realistic assessment of your space and lifestyle, and avoiding the common pitfalls we've outlined in this guide.
Remember that the best feature walls enhance your bedroom's function as a restful retreat while expressing your personal style. They should feel intentional, not overwhelming, and work harmoniously with your room's proportions, lighting, and overall design.
By avoiding these seven critical mistakes—wrong wall selection, poor scale choices, inappropriate colors, installation failures, overwhelming designs, lighting oversights, and short-term thinking—you'll be well on your way to creating a stunning bedroom feature wall that you'll love for years to come.
Take time to plan thoroughly, test your ideas, and don't hesitate to seek professional guidance when needed. Your bedroom sanctuary deserves a feature wall that truly enhances your daily experience of the space.
For additional guidance on planning and executing your perfect bedroom feature wall, explore our comprehensive resources on feature wall design principles and material selection strategies.